How to Choose a Used Wood CNC Machining Center? A Complete Machine Audit Step-by-Step
2025-10-30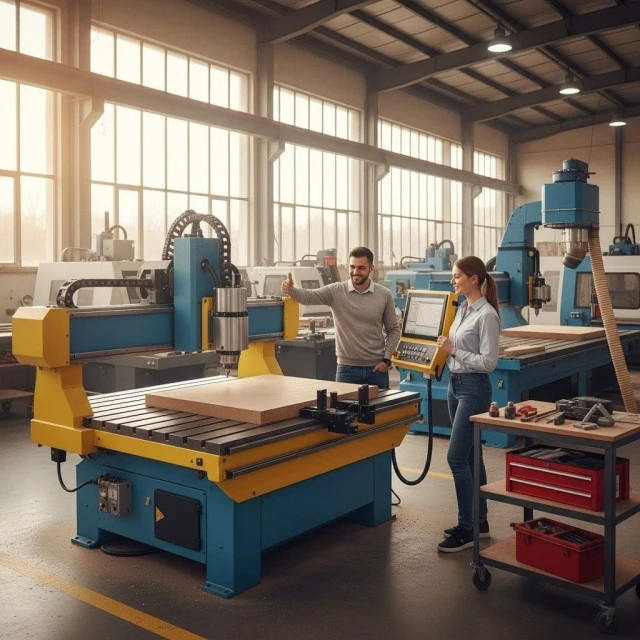
Chapter 1: The Homework – Before You Schedule an Inspection
Buying "just any" CNC is a recipe for disaster. You must buy the right CNC, matched to your production profile.
1.1. Define Your Mission: Key Parameters
You must know what you're looking for.
- Table Type (The Key Decision):
- Flat Table (Nesting): A machine with a flat vacuum table, often with an MDF "spoilboard". Ideal for nesting—cutting full sheets of particleboard, MDF, or plywood. This is the machine for cabinet and case good manufacturers.
- Pod and Rail Table (Console / Beam): A machine where the part is held on special consoles (beams) using vacuum pods (cups). This allows for 5-sided machining (e.g., horizontal drilling, edge processing). Ideal for manufacturers of fronts, doors, windows, chairs, and solid wood components.
- Working Area (X, Y, Z):
- X, Y: What is the largest panel or part you will process? A market standard is often around 3050x1530 mm or larger.
- Z-Axis (Clearance): How tall are the parts you will machine? Standard clearance (e.g., 150-200 mm) is fine for panels, but for machining molds, models, or solid wood parts, you'll need much more.
- Number of Axes:
- 3-Axis: Standard for nesting, milling, and drilling.
- 4-Axis: An additional "C" rotational axis on the spindle, allowing the use of aggregates (e.g., a grooving saw, horizontal drill). Vastly increases flexibility.
- 5-Axis: Full control over the tool's angle. These are machines for complex 3D machining, molds, models, and chair components. They are the most expensive and complex to program.
1.2. Preliminary Interview with the Seller
Ask precise questions so you don't waste time on a trip:
- "May I have the exact model, year of manufacture, and control model?" (e.g., Homag WoodWOP, Biesse BiesseWorks, SCM Xilog).
- "How many hours has the spindle run, and how many hours has the machine been powered on?" (Spindle hours are the real indicator of wear).
- "What materials were primarily machined on it?" (MDF/particleboard is extremely abrasive. Solid wood is less so).
- "Is the machine under power, functional, and can it be tested under load?" (If not, the risk increases dramatically).
- "Have the spindle or vacuum pump ever been replaced or refurbished? If so, I'd like to see the documentation."
Chapter 2: The Heart of the Machine – The Spindle (Electrospindle) Audit
This is the single most important, most expensive, and most wear-sensitive component of a CNC center. A spindle failure means downtime and a repair cost in the thousands or tens of thousands.
2.1. Spindle Specifications
- Power (kW): Must be matched to the job. 8-10 kW is sufficient for nesting particleboard. For heavy solid wood machining or stacked panels, 12-15 kW or more is needed.
- Cooling:
- Air-Cooled: Simpler, cheaper, but louder. Sensitive to ambient dust.
- Liquid-Cooled (Water/Glycol): Quieter, more stable operating temperature. Requires an external chiller unit. Check the chiller—is it working, are there leaks, is it clean?
- Tool Holding System:
- HSK-63F: The market standard in woodworking machines. Provides excellent rigidity and precision.
- ISO-30: A lighter system, popular in smaller machines.
2.2. Physical Inspection (Machine OFF)
- Spindle Taper: Ask to have the tool holder removed. Using a clean cloth and a flashlight, carefully inspect the internal taper of the spindle. Look for rust, pitting, scratches, or signs of "fretting" (a rusty-looking deposit). Any blemish on this surface means problems with precision and bearing life.
- Tool Clamping System: Check that the mechanism (usually pneumatic) works smoothly.
- Runout Test (Advanced): If you have a dial indicator with a precision test bar, mount it and check the runout on the taper and at the end of the test bar. Any value over 0.01-0.02 mm (0.0004" - 0.0008") on the taper is alarming.
2.3. Functional Test (Machine ON)
- Cold Start: Start the spindle at low RPM (e.g., 6000 RPM). Listen. You should only hear a quiet hum from the motor and air. Any knocking, grinding, "crunching," or loud whining indicates worn bearings.
- Warm-up Program: Professional machines have a spindle warm-up cycle. Ask to run it. The machine should smoothly increase RPM every few minutes. Listen at each stage.
- Max RPM Test: Run the spindle at maximum RPM (e.g., 18,000 or 24,000 RPM) with no load for a few minutes. The sound must be consistent, smooth, and free of vibration.
- Temperature Test: After a few minutes at high RPM, stop the spindle and carefully touch its housing. It should be warm, but not hot. Excessive heat = bearing or cooling problems.
- Load Test: This will be covered in Chapter 6.
Chapter 3: The Foundation – The Table and Vacuum System
Without solid, leak-free material clamping, all the CNC's precision is worthless.
3.1. Flat Table (Nesting)
- Spoilboard: This is a consumable item (usually MDF). Check its condition. If it's heavily milled, you will need to plane it (fly-cut) or replace it.
- The Actual Table (Grid Table): Ask to have the spoilboard removed to see the main table (usually black, made of phenolic resin or aluminum). Check that it isn't cracked, deeply scratched, or damaged by a tool that cut through the spoilboard.
- Vacuum Zones: Most tables are divided into zones (e.g., 6 or 8). Ask to have each zone turned on and off from the controller. They must respond immediately.
- Pop-up Pins (Reference Pins): If the machine has them, check that all pins pneumatically raise and lower. Are any of them bent?
3.2. Pod and Rail Table (Console)
- Console/Beam Movement: Check that the consoles move smoothly on their guides. Does the locking system (usually pneumatic) hold them firmly?
- Vacuum Pods (Cups): This is a key element. Inspect the rubber gaskets on every pod. They must be soft and flexible. Hardened, cracked, or chipped rubber will not hold a vacuum. The cost to replace a full set of pods is very high.
- Positioning System: If the machine has a laser or LED indicators for positioning pods and beams, check that the system works and is accurate.
3.3. The Vacuum Pump (Lungs of the Machine)
This is the heart of the clamping system.
- Pump Type: You will most often find dry-vane pumps (e.g., Becker) or oil-flooded pumps (e.g., Busch). Dry pumps are popular, but their graphite vanes are a consumable part that must be replaced regularly.
- Location: Is the pump next to the machine (loud), or in a separate room (ideal)?
- Start and Run Test: Start the pump. Listen. Excessive knocking, grinding, or "screaming" is a bad sign.
- Suction Test: Turn on the vacuum for one zone. Place a piece of panel on it (e.g., 1x1m). Try to slide it with your hands. It should be held absolutely firm. If you can move it, the system has a leak or the pump is worn.
- Filters: Locate the main vacuum filter (usually a large canister). Ask when it was last cleaned. A neglected filter "chokes" the pump and leads to its seizure.
Chapter 4: The Brain & Nervous System – CNC Control and Electrical Cabinet
The controller determines functionality and ease of use. The electrical cabinet determines reliability.
4.1. Controller and Software
- Brand and System: (e.g., Homag WoodWOP, Biesse BiesseWorks, SCM Xilog, Fanuc, Siemens). Is it a "Windows-based" graphical system, or an old G-code-based system?
- Compatibility (CRITICAL!): This is the most important point. Ask what CAM software the shop uses (e.g., AlphaCAM, TopSolid Wood, VCarve Pro, Aspire). Do you have (or can you buy) a post-processor for your CAM that will generate correct code for this exact machine and controller model? A machine without a working post-processor is a useless piece of furniture.
- Interface: Start the controller. Check the response of the screen (if touchscreen), keyboard, and mouse. Do all buttons on the main panel and the remote pendant (JOG) work?
- Loading Programs: Check how programs are loaded. Does the USB port work? Does the network (Ethernet) connection work?
4.2. The Electrical Cabinet
- OPEN THE CABINET. The first impression is key.
- Cleanliness: The cabinet must be perfectly clean. A thick layer of wood dust in the cabinet is a mortal danger. Dust is hygroscopic (absorbs moisture), conductive, and flammable. It's a direct path to a short circuit and burning out expensive servo drives.
- Cabinet Cooling: Check the fans and filters on the cabinet. They must be clean and clear. Clogged filters = overheating electronics.
- Servo Drives: Locate the servo drives (inverters) for the X, Y, and Z axes. Are there any red "FAULT" lights on any of them?
- "Hacks" (Non-Factory Repairs): Look for hanging wires, bridged fuses, or non-original relays. This is a sign the machine had electrical problems that were "patched" with shortcuts.
Chapter 5: The Skeleton – Mechanics, Guides, and Drive Systems
These are responsible for the machine's accuracy and repeatability. Wood dust is their #1 enemy.
5.1. Frame and Gantry
- The construction must be massive, heavy, and welded. Light, bolted-together frames will vibrate during high-speed machining.
- Look for signs of a crash—cracks, dents, or signs of straightening or re-welding.
5.2. Linear Guides and Drives
- Linear Guides: Inspect all guides (X, Y, Z). They must be clean and covered with a thin film of grease. If they are dry, rusty, or (worse) covered in a resinous sludge of dust and grease, their life is near its end.
- Covers (Bellows): Check the condition of the accordion-style bellows on the guides and screws. They must be sealed. A cracked or torn bellow is an invitation for dust, which will destroy the mechanics.
- Drive System:
- Ball Screws (Usually Z-axis, sometimes Y): With the machine off, grab the spindle and try to forcefully move it up-and-down and front-to-back. Any noticeable "clunk" or play (backlash) means the screw or ball nut is worn.
- Rack and Pinion (Usually long X and Y axes): Inspect the teeth on the rack and the pinion gear on the servo motor. Look for excessive wear or chipped teeth. They must be coated in grease.
- Automatic Lubrication System: Locate the central grease pump. Is there grease in it? Is it set up and working? Ask if the machine performs a lube cycle automatically. A non-functional lubrication system is a guarantee of a quick death for the guides and drives.
Chapter 6: The "Test Drive" – Practical Tests in Material
This is the moment of truth, which verifies that all components work together. Ask to run a test program on a piece of panel.
6.1. The Test Program
If the seller doesn't have a program ready, ask them to quickly write one (or do it yourself, if you can) that:
- Cuts a large rectangle (e.g., 1500 x 1000 mm).
- Cuts a large circle (e.g., 800 mm diameter).
- Performs a series of drill holes (if it has a drill head).
6.2. What to Watch and Listen For
- During the Cut:
- Vibration: Does the machine vibrate during the cut? Does the spindle "scream" or "protest" loudly?
- Noise on Direction Change: Listen at the corners of the rectangle. Any "clunk" or "jerk" when changing direction (e.g., from X to Y) is a sign of backlash in the drives.
- Movement Smoothness: Is the motion smooth, or "jerky"?
- Dust Extraction: Is the dust collection system efficient? Is dust being effectively collected from the tool?
6.3. Inspecting the Cut Part
- Rectangle – The "Square" Test: Measure the diagonals of the cut rectangle. They MUST be perfectly equal (with a tolerance of e.g., 0.5 mm). If the diagonals differ, it means the machine is not geometrically true ("out of square")—the gantry is skewed. This is a very serious defect.
- Rectangle – Dimension Test: Measure the sides. Is the 1500x1000 mm rectangle actually that size? This tests the positioning accuracy.
- Circle – Kinematics Test: Look at the edge of the circle. Is it perfectly smooth and round? Or is it "oval-shaped" or have visible small "steps" or "flats" at the 0, 90, 180, and 270-degree points? Such defects indicate problems with backlash or servo tuning.
- Edge Quality: What is the edge quality after milling? Is it smooth, or torn out? (This is largely the tool's fault, but also spindle vibration).
Chapter 7: Peripherals – Tool Changer, Drill Head, Aggregates
These elements determine the machine's flexibility.
- Automatic Tool Changer (ATC):
- Type: Linear (on the frame or side) or Rotary (a carousel on the gantry).
- Functional Test: Ask to run a tool change cycle for every pocket in the magazine. Watch. The change must be fast, smooth, and confident. Any jamming, trouble hitting the taper, or dropping a tool is a serious problem.
- Tool Holders: How many tool holders (e.g., HSK-63F) are included? They are expensive. Inspect their condition—are they clean, or rusty and covered in resin?
- Drill Head (if present):
- Ask to test each drill bit individually (vertical and horizontal). Do they all pneumatically extend and spin?
- Aggregates (if present):
- These are special heads (e.g., a grooving saw, an angled head for horizontal drilling). Ask to see them run. These are very expensive and precise accessories.
Conclusion: The Final Calculation
You've gone through the entire audit. You have a list of potential problems. It's time to make a decision.
- The Real Price: Purchase Price + Cost of transport and installation + Cost of creating a post-processor (if you don't have one) + Cost of diagnosed repairs (e.g., replacing vanes in the vacuum pump, a new set of pods, a spindle rebuild).
- Risk Analysis: Does the sum of these costs still make this machine a bargain? Would it be better to buy a newer, more expensive, but certified machine?
Buying a used wood CNC center is a high-stakes game, but with a powerful reward. Armed with this checklist, you drastically reduce your risk and are able to make an informed, engineering-based decision.
Feeling Overwhelmed? Trust the Experts.
At WeSellMachines.com, this process is our daily business. We audit dozens of machines to select only those that meet our rigorous standards.
[Link ->] See our currently available, inspected wood CNC machining centers.
新增内容:
 BIAŁCZYK Sp. z o.o.
消息

欧洲金属加工车间如何在新的工业时代中取得成功
欧洲金属加工企业可以利用再工业化、近岸外包以及能源、电动汽车和国防领域蓬勃发展的需求,转向利润更高的长期合同。通过专业化发展、升级设备(包括二手设备)以及提升质量和销售的专业水平,他们可以在像 wesellmachines.com 这样由工程师 Marcin Białczyk 领导的平台的支持下快速实现现代化。 阅读更多

2026年2月初,欧洲工业界正在发生什么?
了解不断上升的 PMI 指数和新的欧盟工业加速器法案将如何影响 2026 年的机器估值。来自 wesellmachines.com 的评估师 Marcin Białczyk 分析了工业 4.0 时代数控设备的市场趋势、重置价值和功能过时情况。 阅读更多

绿色钢铁革命:产业转型战略分析
对钢铁行业向绿色钢铁转型进行战略分析。专家马尔钦·比亚乌奇克探讨了直接还原铁(DRI)和电弧炉(EAF)技术、“Fit for 55”计划、CBAM(碳中碳吸收和制造)以及工业机械估值在脱碳和ESG(环境、社会和治理)要求时代面临的挑战。 阅读更多

2026年现代管材和型材弯曲机的评估
Marcin Białczyk(wesellmachines.com)重新定义了2026年的CNC弯曲机评估。关键要点:全电动技术和IIoT数据通过极高的精度(±0.05°)和能源效率(节省50%)推动更高的残余价值。本指南将技术评估与2026年制造业的融资路径(FENG,BGK)结合起来。 阅读更多

制钉机估值:你到底买到了什么?专家解析
为什么一台20年机龄的Wafios自动制钉机比全新的进口机器还要贵?WeSellMachines的Marcin Białczyk为您揭示经过自然时效处理的铸铁机身、机械式废料分离系统(Nipping)以及原厂技术文档背后的隐形价值。了解为何在重工业中,投资者为材料物理性能买单,而不是为生产年份买单。 阅读更多

如何购买一台二手多功能切割锯并彻底改变您的锯木厂
二手木工机械市场规模庞大,但也暗藏陷阱。作为一名见过数百台“表面光鲜亮丽”实则内部早已损毁的机器的专家,我特地为您准备了这份全面的指南。这并非夸大其词的营销宣传,而是扎实的工程知识,能够帮助您独立评估机器的技术状况。 阅读更多

“廉价家具”时代的终结?2026–2030年您的生存与增长战略
几十年来,波兰木材和家具行业一直是无可争议的出口领导者,2024年创造了令人印象深刻的 163亿欧元 产值。我们曾是“欧洲的家具工厂”,凭借价格优势、原材料供应和熟练的技术工人取胜。然而,现在已是2025年12月,作为一名每天走访工厂的一线从业者,我清楚地看到:这种模式刚刚走到了尽头。 阅读更多

2025/2026 战略报告:金属加工行业的资产盈利能力与技术转型
波兰及中欧的金属加工行业正步入一个宏观经济分析中定义为“超高效时代” (Hyper-Efficiency Era) 的阶段。面对不稳定的经济环境以及钢铁消费增长仅为 2.2% 的预测,投资容错空间已不复存在。 作为 wesellmachines.com,我们发现了一个根本性的范式转变:从“不惜一切代价增长” (Growth-at-all-costs) 战略向“资产利用与现金流保护” (Asset Utilization & Cash Flow Protection) 战略过渡。在本报告中,我们将分析为什么在 2025-2026 年,生存的关键不在于购买“新”设备,而在于购买“高效”设备——这往往意味着关注二级市场。 阅读更多

How to Choose a Used Wood CNC Machining Center? A Complete Machine Audit Step-by-Step
Buying a used wood CNC machining center is a huge opportunity, but also a massive risk. Pervasive MDF dust destroys key components, and the cost of repairing a spindle or vacuum pump is staggering. This complete guide (5000+ words) is a professional technical audit in a nutshell. We will teach you how to inspect the machine step-by-step—from spindle diagnostics and vacuum table leak tests to assessing mechanics and controls. Avoid a costly mistake and make an informed investment with our expert checklist. 阅读更多

The Complete Guide: How to Buy a Used CNC Press Brake and Not Regret the Investment
Buying a used CNC press brake is a strategic but risky investment. This article is a complete guide that explains, step-by-step, how to conduct a professional technical inspection to minimize risk. The author, an expert with 20 years of experience, describes the key elements to check: from evaluating the frame and hydraulics, through diagnostics of the CNC control, to verifying the completeness of the documentation. The article provides the necessary knowledge to make an informed and safe decision, helping to avoid costly mistakes. 阅读更多
")
AI in European Industry: How Artificial Intelligence Shapes New Roles for Managers and Specialists (Competencies 2026)
The impact of Artificial Intelligence (AI) is a pivotal topic across the entire European manufacturing sector. From German automotive to French chemicals, enterprises throughout the European Union are actively implementing AI and Machine Learning (ML) solutions, leading to a revolution in job roles. This article analyzes how AI is transforming the roles of managers and specialists, shifting from routine tasks to predictive analytics and strategic system management. We outline the essential competencies needed to thrive in the era of Industry 5.0. 阅读更多
 and Avoiding Legal Penalties")
Technological Audit of the Machine Park: Key to Increasing Efficiency (OEE) and Avoiding Legal Penalties
The technological audit is a strategic tool that allows companies to transform their equipment into a business asset. It focuses on 3 pillars: technology, processes (CT loss reduction, OEE), and Compliance (adherence to EU law). Regular investment leads to TCO reduction and increased machine lifespan, ensuring decisions are based on facts, not guesswork. 阅读更多
Crisis in the Metal Industry? It's the Perfect Time to Invest in Your Competitive Edge.
The European metal industry is caught in a perfect storm: soaring energy costs, a shortage of skilled labor, and mounting pressure on margins are keeping business owners awake at night. In such conditions, the gut reaction is to cut costs and wait for better times. However, business history teaches us that it is precisely in the most difficult moments that the best players make strategic moves that secure their dominance for years to come. In this article, we'll show you why the current crisis is actually a wake-up call to action and how targeted investments in a modern machine park are the most effective response to the market's biggest challenges. 阅读更多

2025 Trends Report: The Technological Future of Polish Industry. An Analysis for Business Leaders in Key Regions
The year 2025 marks a turning point for the Polish industrial sector. Traditional cost advantages are eroding, and market position is now determined by the ability for strategic technological adaptation. Business leaders across Poland—from production plants in Silesia, through furniture centers in Greater Poland, to innovative clusters in Subcarpathia—face three key imperatives: intelligent automation, the implementation of artificial intelligence, and the operationalization of sustainable development. This report provides an in-depth analysis of these trends, offering strategic insight into the technologies and processes that will define market winners in the coming years. 阅读更多
German Industrial Production Surges: 3.0% Increase in March 2025
According to preliminary data from the Federal Statistical Office (Destatis), industrial production in Germany saw a significant increase of 3.0 percent in March 2025 compared to the previous month, after adjusting for seasonal and calendar effects. While production was 0.2 percent lower compared to March 2024, the latest figures indicate positive momentum in the German industrial sector. 阅读更多
 使用以下方式登录 Facebook
 使用以下方式登录 Google